

Getting started
Open a folder. Find your way.
Make your first KEEP decision.
Before you begin
KeepDrop works directly with local Finder folders. It does not connect to Apple Photos or iCloud Photos. Export media to a local folder first if needed; a Live Photo requires its image and paired video.
Use All to browse the shared library, Favorites to revisit starred items, and Similar to review related photos. Adding or selecting a folder does not move or delete its files.
For a first review that includes file operations, use a small folder of disposable copies.
01 / Add a folder
- Choose File → Add Folder… or press ⌘ O. You can also use the + beside Folders in the sidebar.
- Select a local folder and grant access when macOS asks. Wait for scanning to finish.
- Select the folder to browse it, or choose All to see media from every added folder. Favorites is available even when it is empty.
Adding a folder registers access to its originals without making another copy. Removing it from the library leaves its files in Finder; it does not necessarily clear every saved review decision.
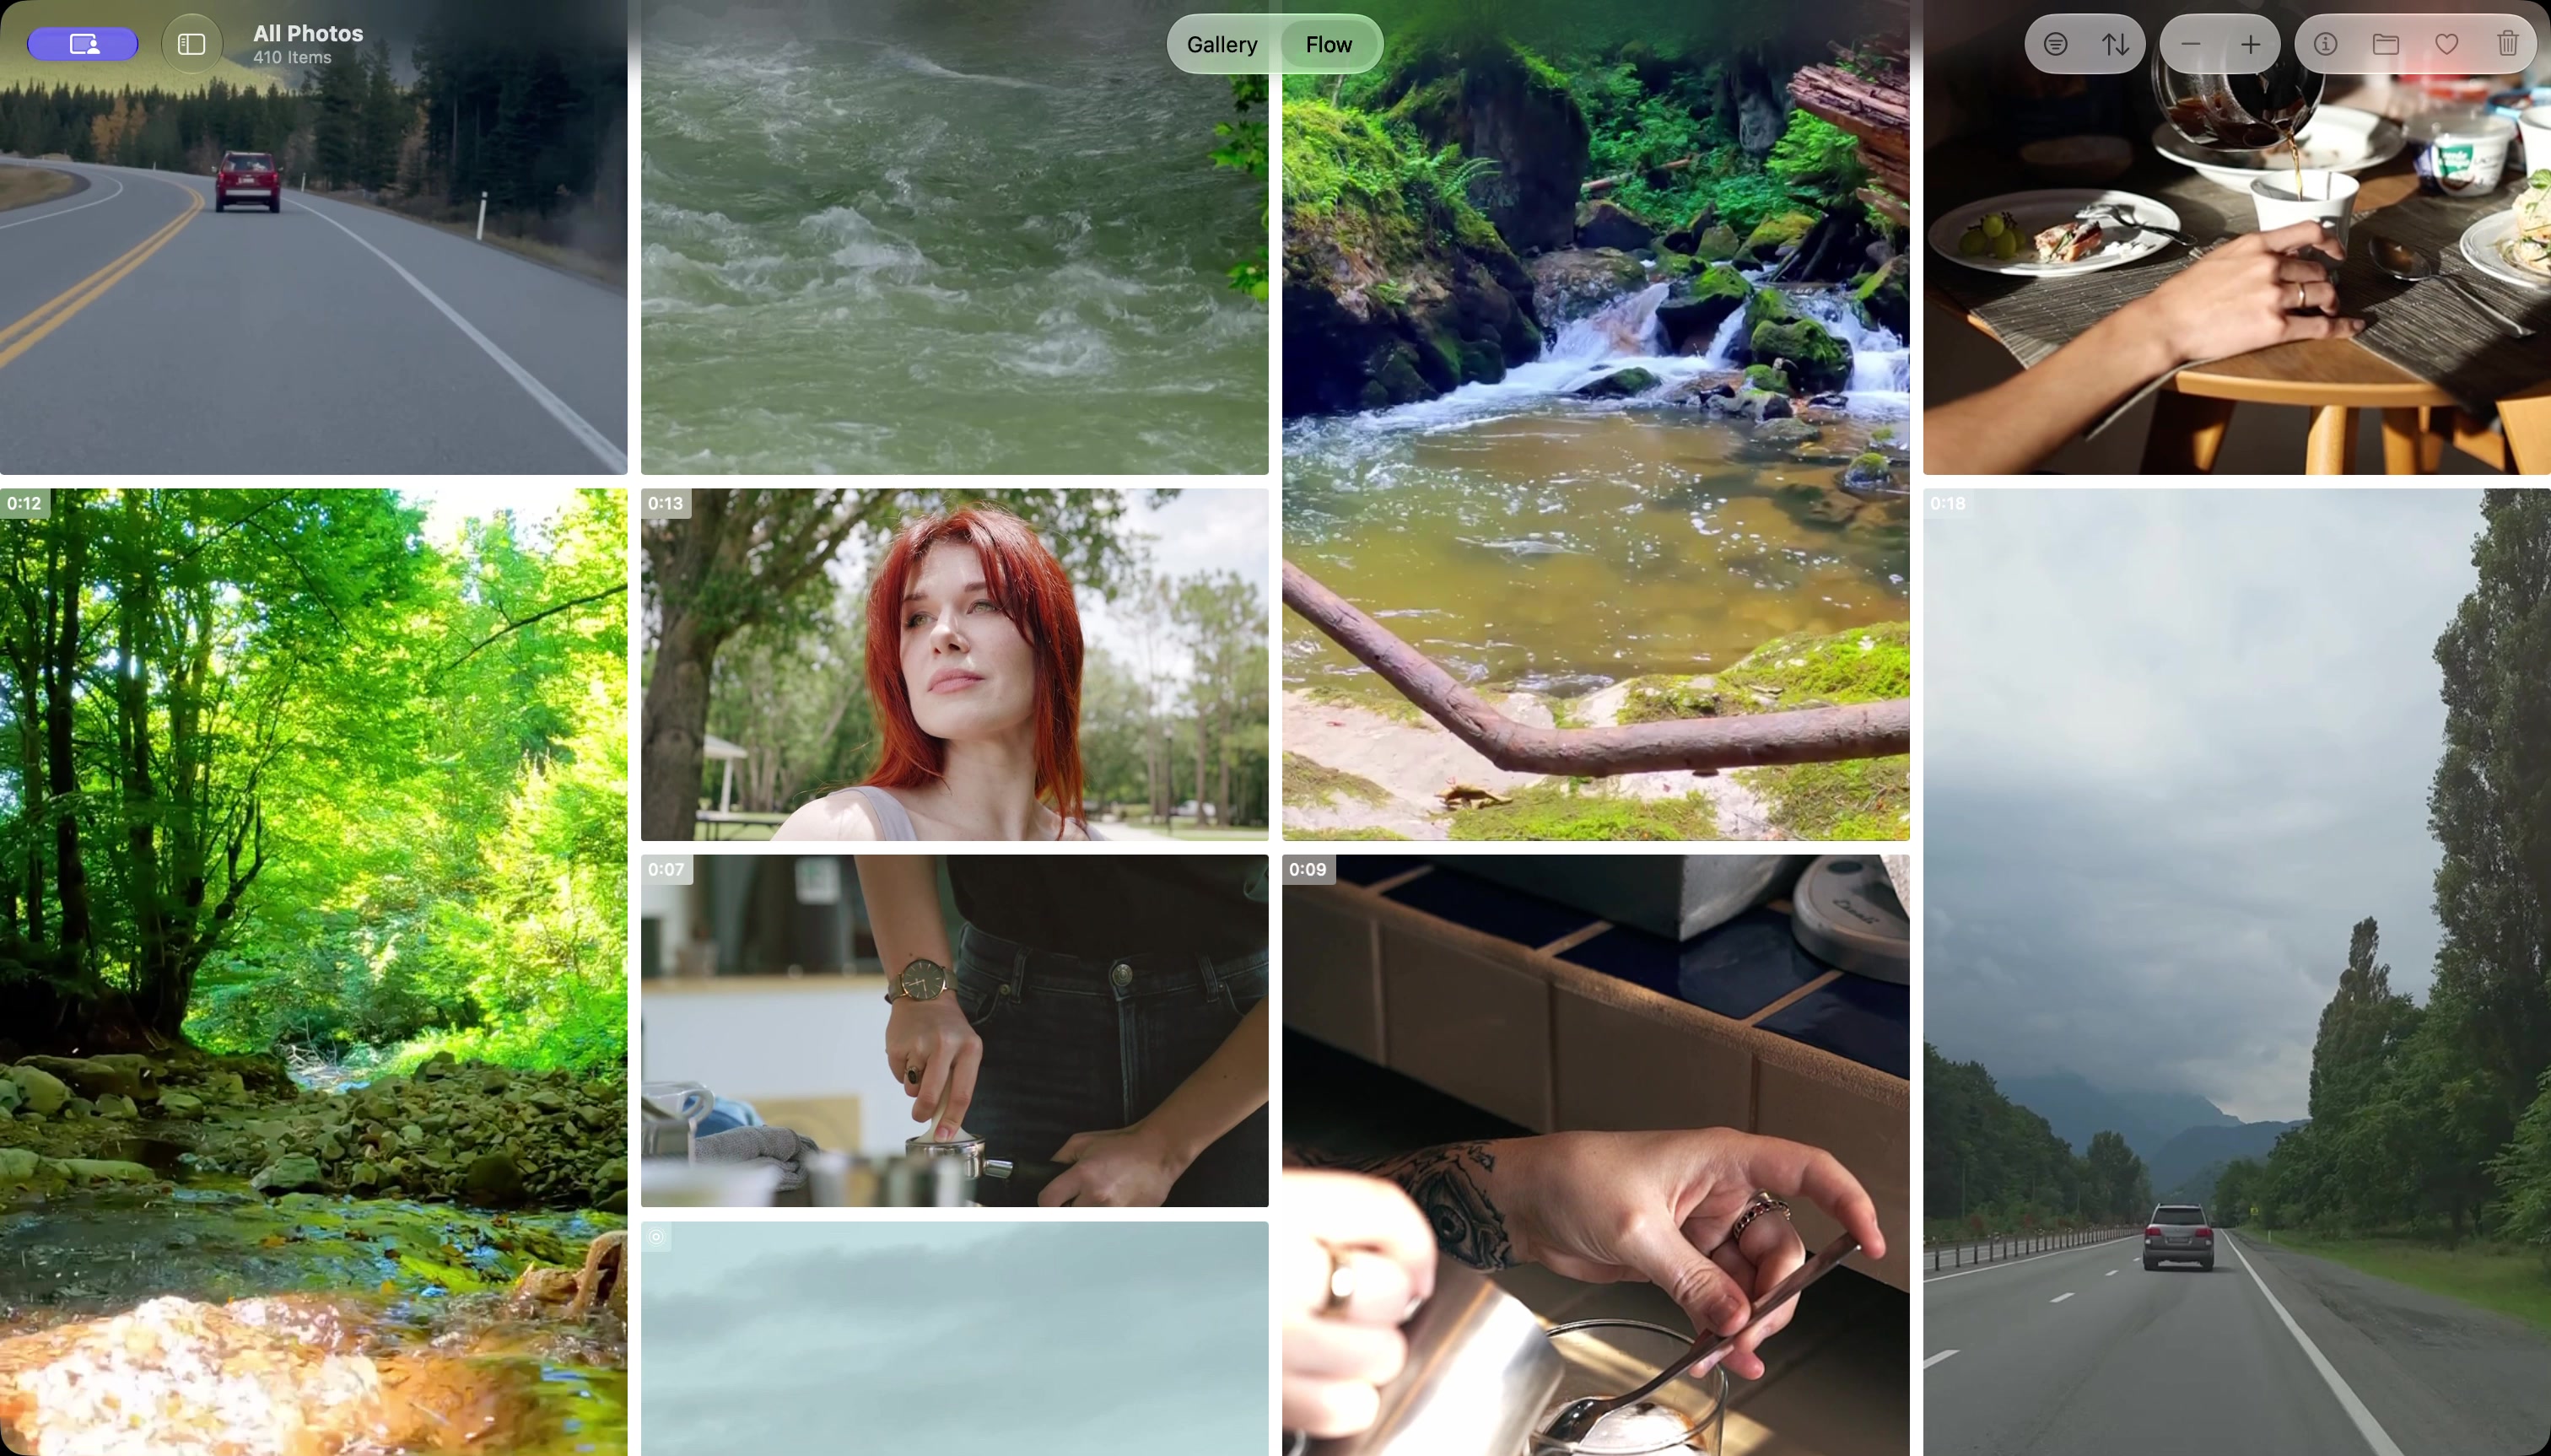
02 / Browse in Flow
- Select All, Favorites or a folder, then choose Flow in the Gallery / Flow control at the top.
- Scroll through photos at their natural proportions. Video and Live Photo playback follows the Flow playback settings.
- Double-click a photo, or select it and press Return, to open Focus.
03 / Look closer in Focus
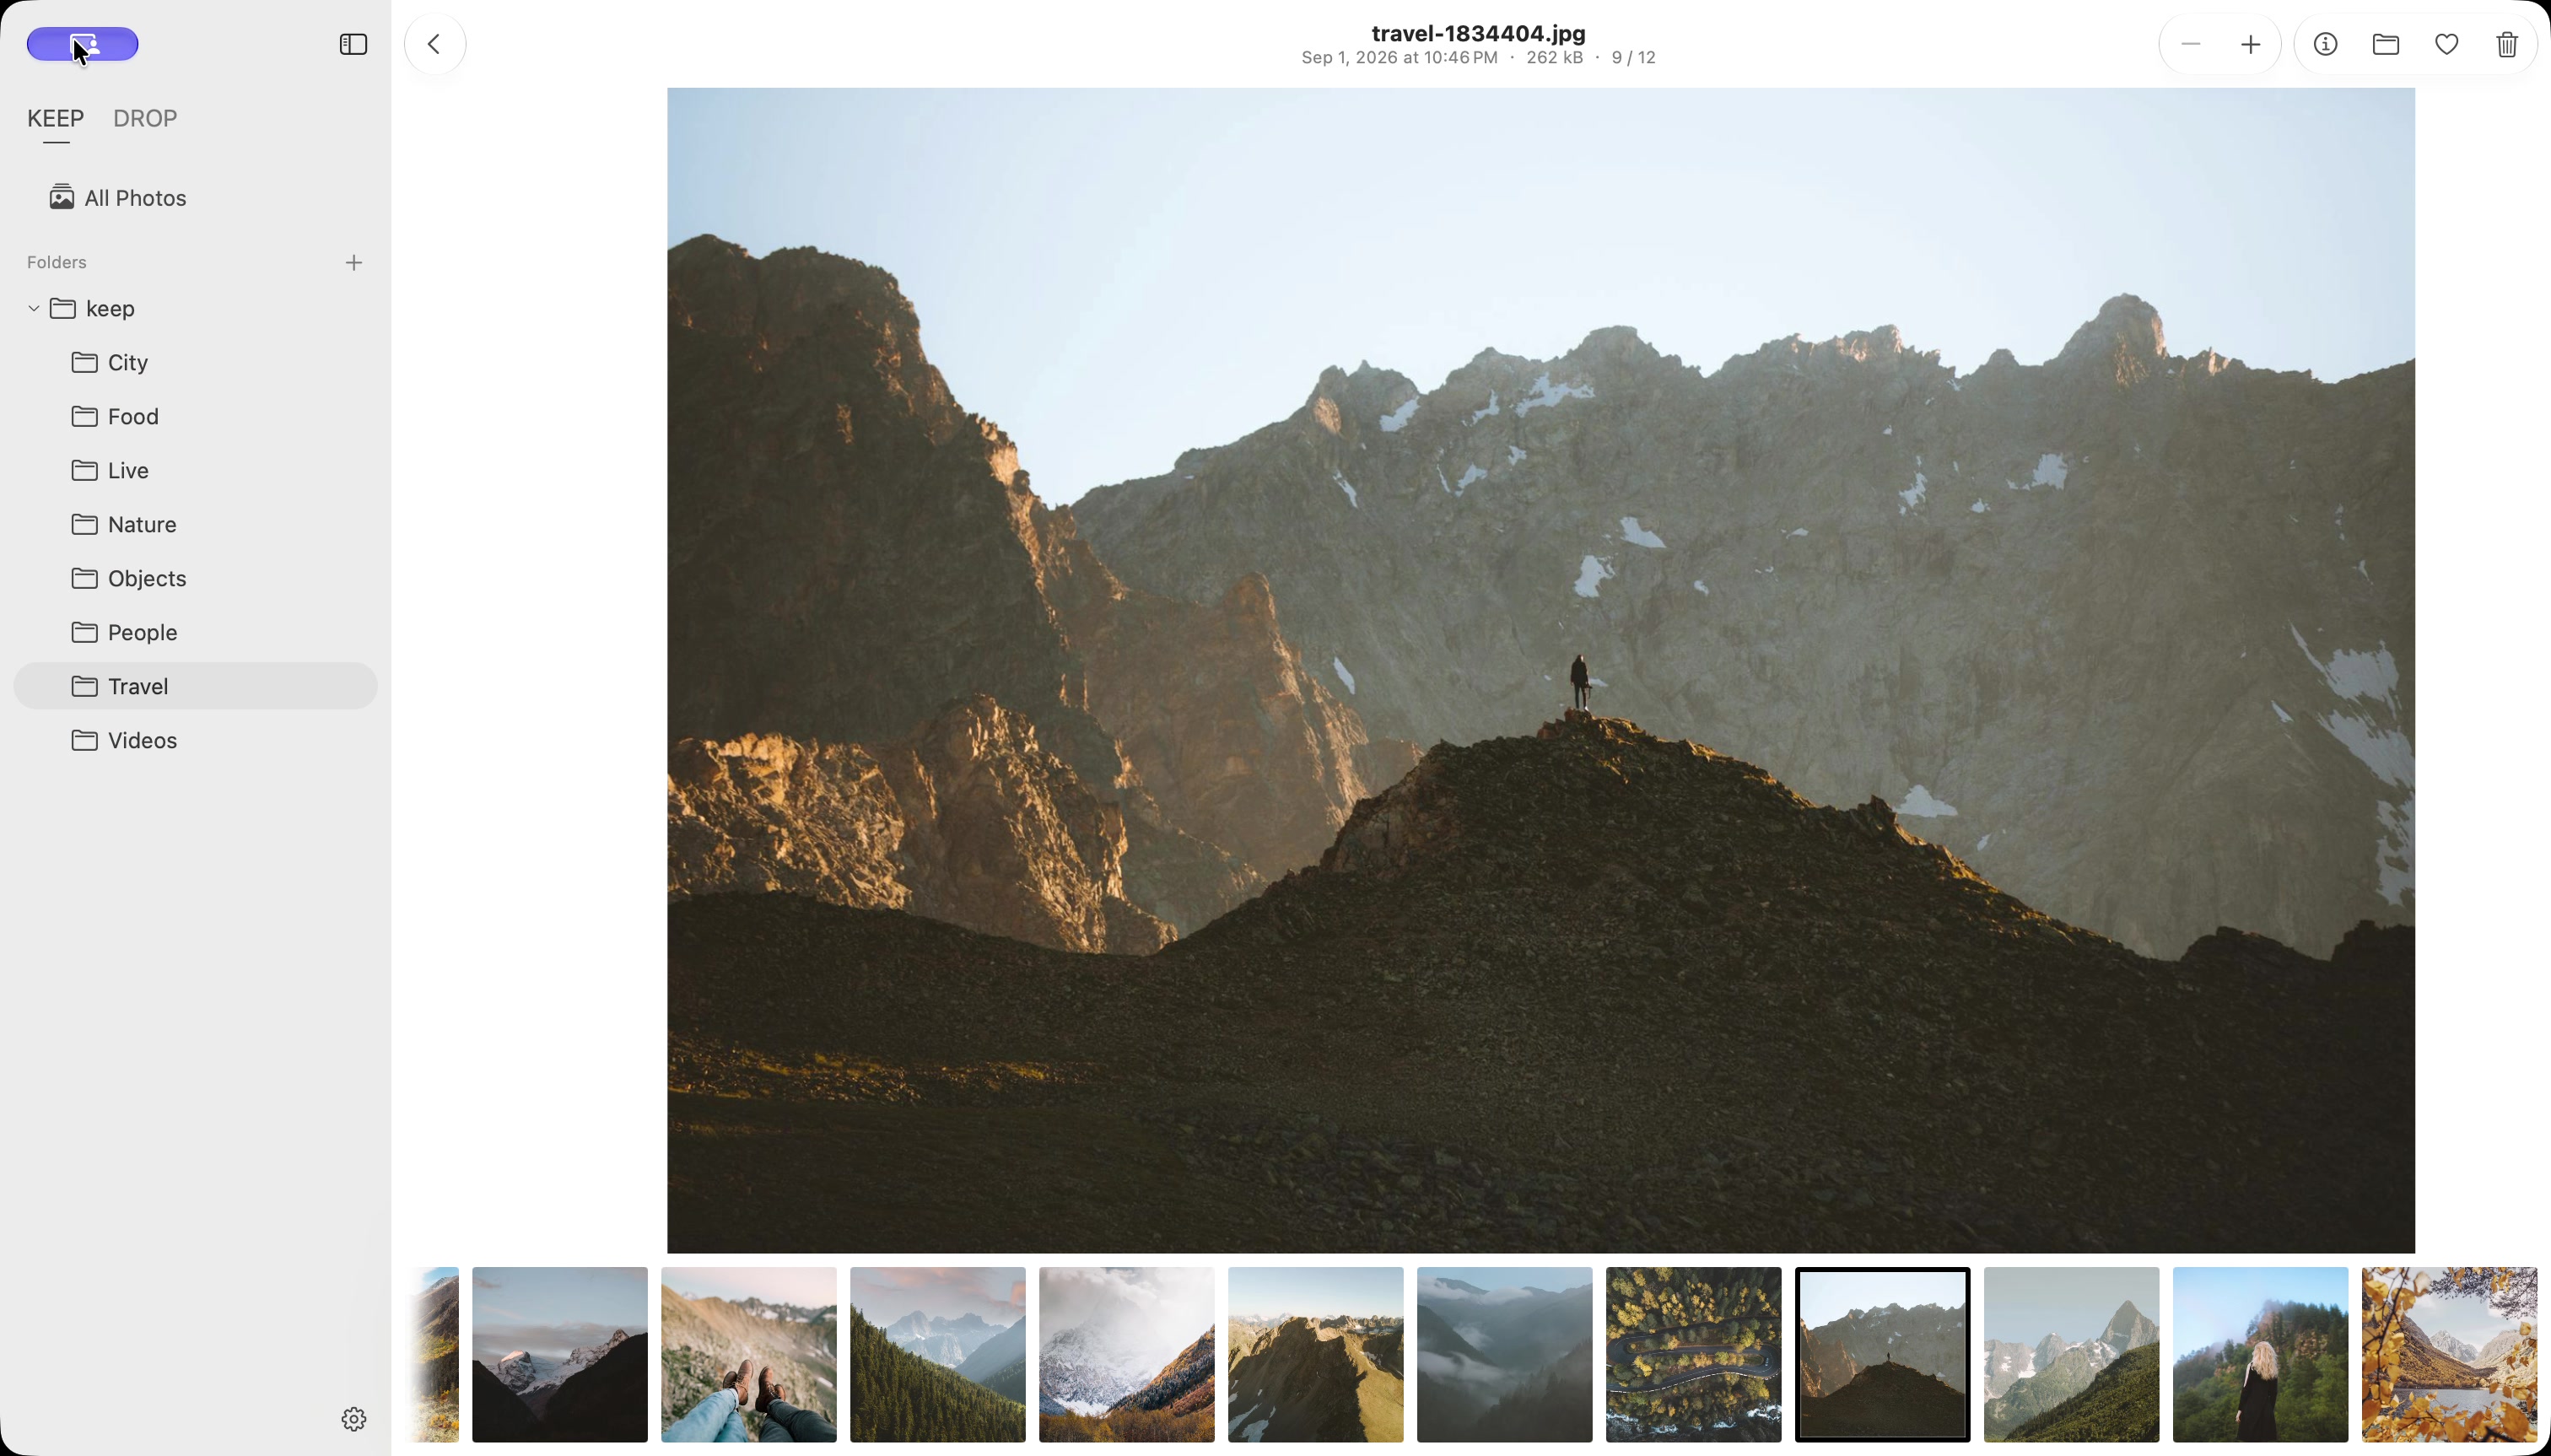
- Open a photo from Gallery or Flow. Focus gives it the main viewing area.
- Use the toolbar + and − controls to change magnification. Drag a magnified image to inspect another part of it.
- Click a thumbnail in the filmstrip along the bottom to view another photo.
- Use the back arrow at the top left of the content area to return to the browser.
04 / Open Similar
- Choose Similar in the sidebar. You do not need to move a folder into a separate DROP workspace.
- Wait for analysis of the shared library. Similarity analysis includes subfolders and can group photos from different registered folders. Standalone videos are excluded.
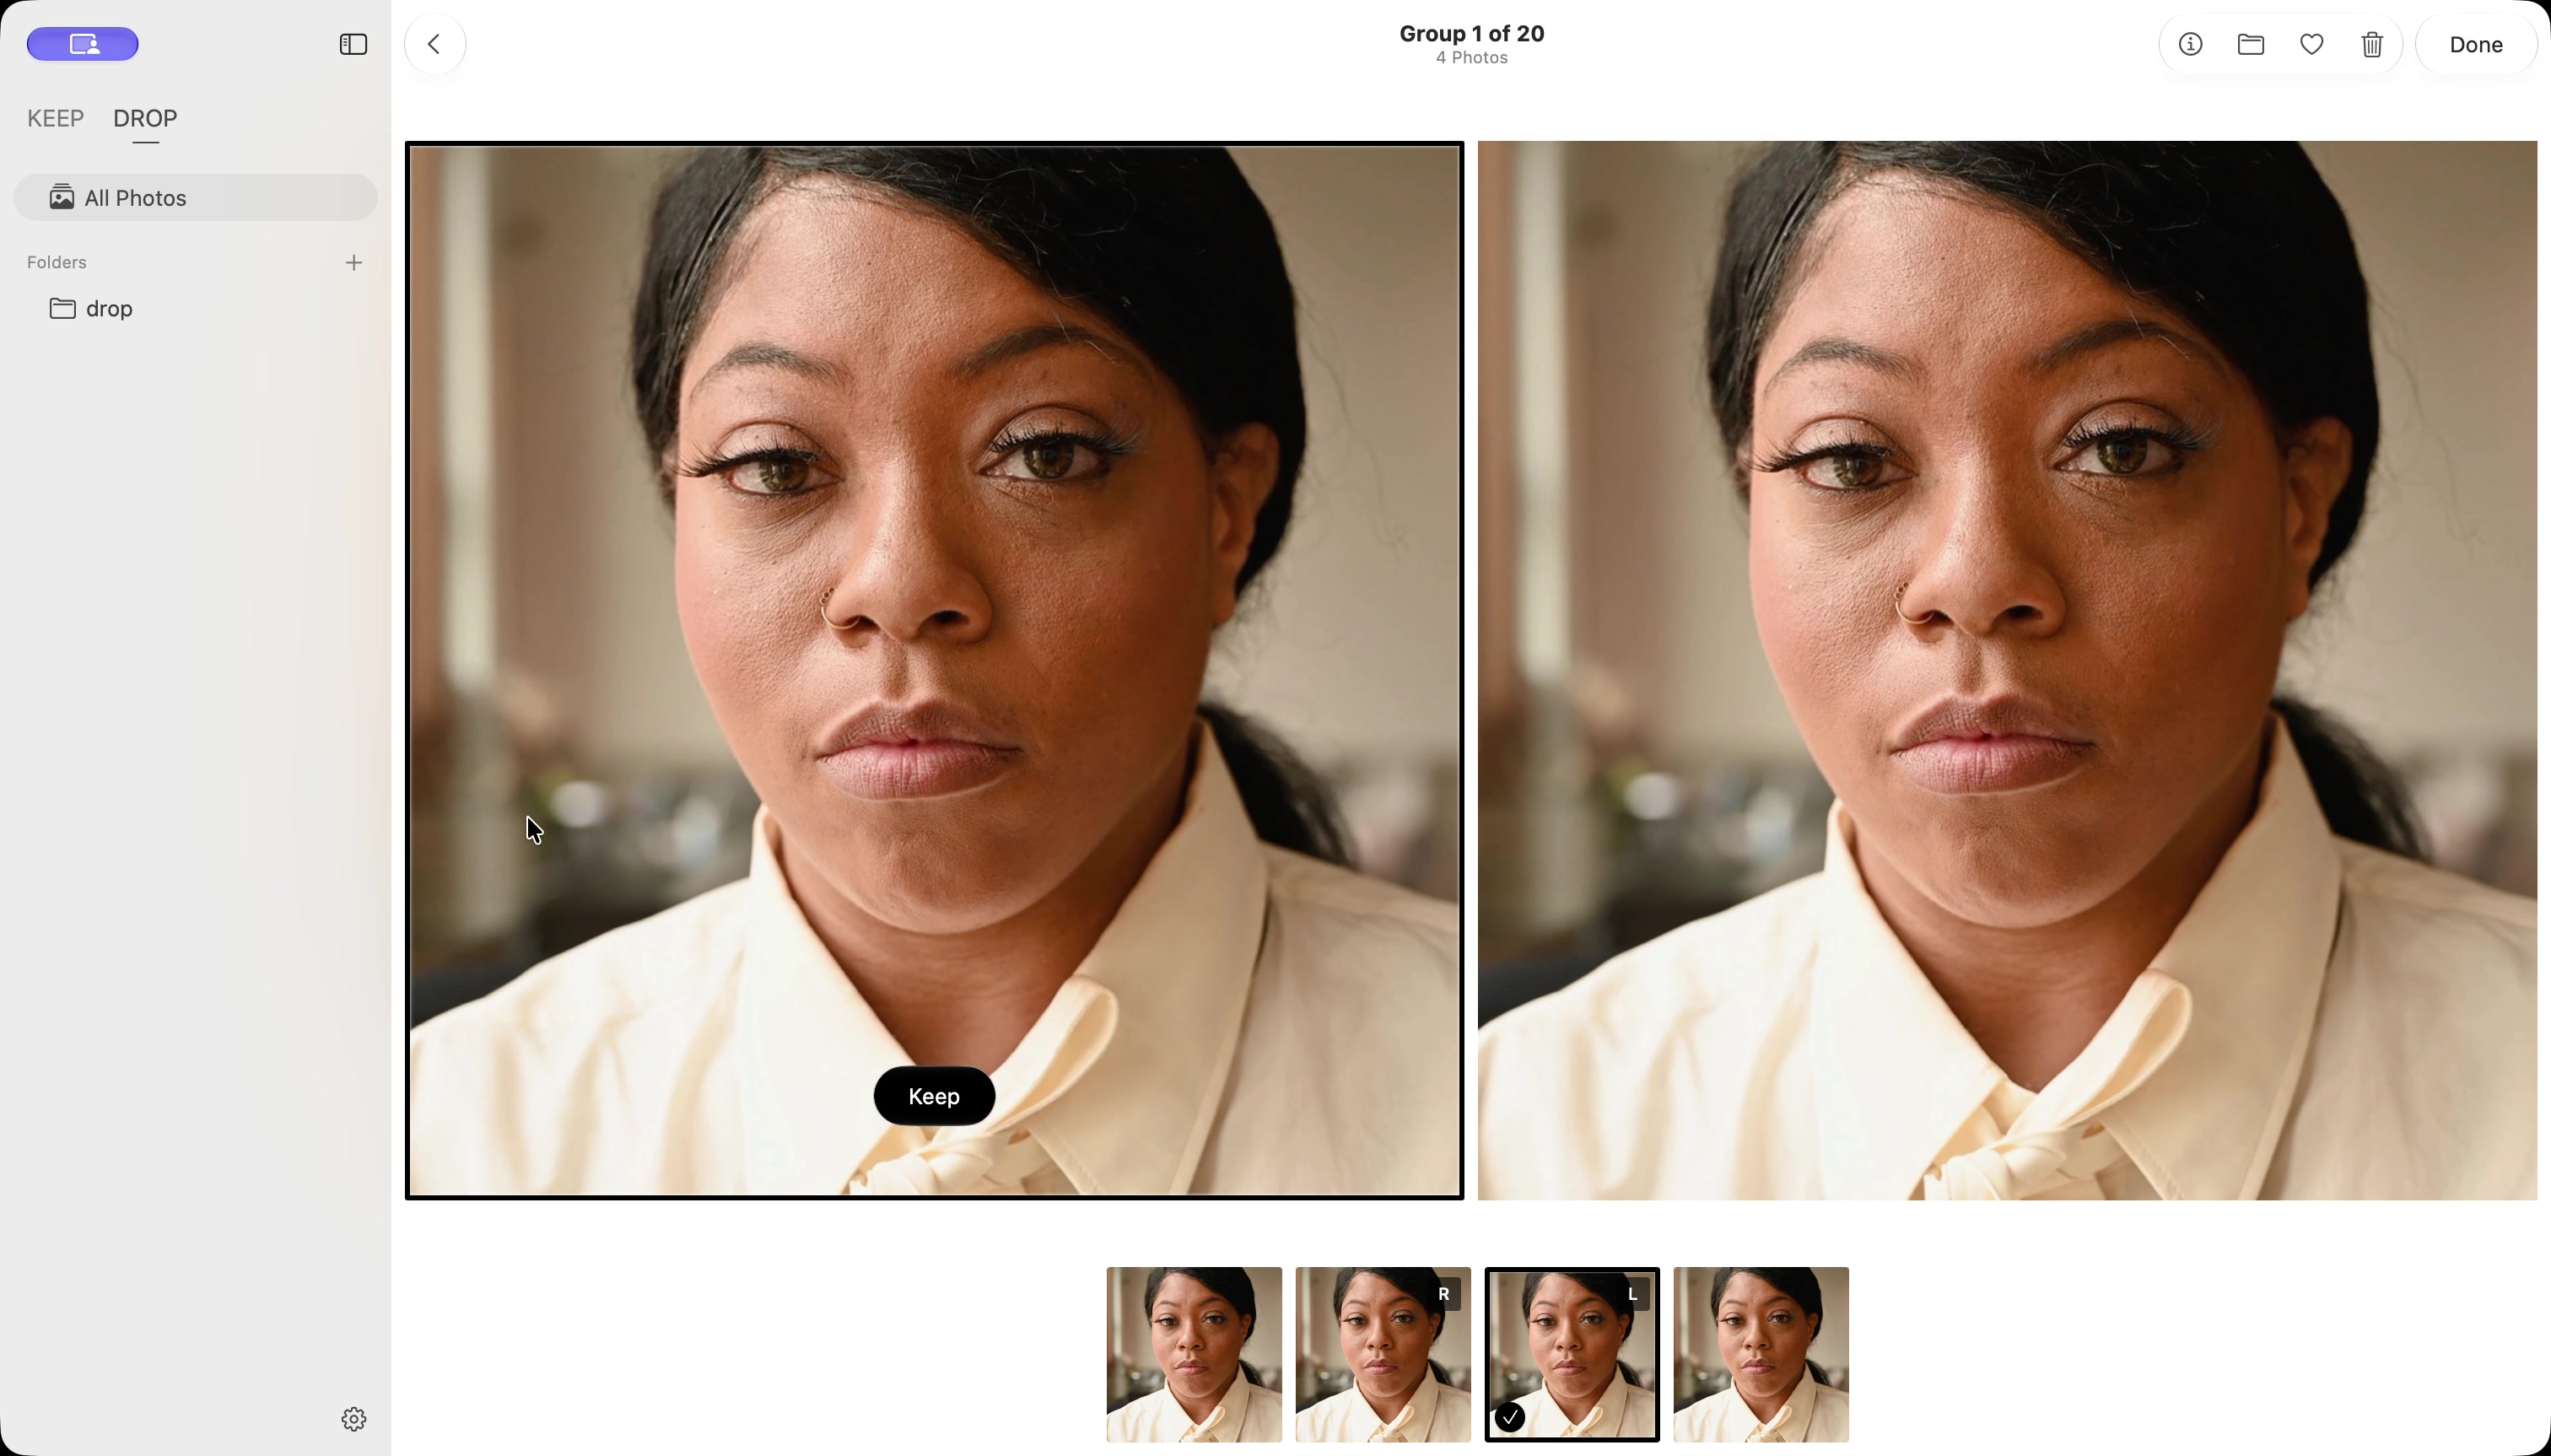
- Double-click a group, or select it and press Return, to compare candidates side by side.
- Choose candidates in the filmstrip. Zoom and pan the comparison views together to inspect details.
05 / Choose Keep
- Inspect the photos and decide which ones you want to retain.
- Move the pointer over a comparison photo to reveal Keep, then click it. You can keep more than one photo in a group.
- Continue through the candidates in the filmstrip. Click Keep again on a kept photo if you want to change that decision.
- Check the kept photos before proceeding to Done.
- Keep on a photo
- A review decision. Done preserves photos marked Keep and proposes moving the remaining photos in the current review scope to Trash. Marking Keep does not move the photo into a KEEP folder.
- Favorite / heart
- An App favorite, separate from the Keep review decision. A Favorite mark does not substitute for Keep when completing a Similar review.
06 / Review and Done
- Click Done in the upper-right toolbar. A confirmation explains the current review scope and how many photos will remain or move to Trash.
- Read the summary. Verify the kept count, the number proposed for removal and any filter scope. Choose Cancel to return and change your choices.
- Confirm with Done only when the summary matches your decision. Files without Keep in that review scope are moved to the Mac’s Trash.
- Wait for the result. Review the completion message. If an operation reports a partial result or a failure, check what happened before trying again.
If no photos are marked Keep, all photos in the current review scope are proposed for Trash. If every photo is marked Keep, the confirmation says no photos will be deleted.
Use Done for this keep-and-review workflow. The separate Delete control acts on its own selection; read that action’s confirmation independently. Confirmed file operations affect your originals, including the image and video members of paired Live Photos.
A capture of the final confirmation screen will be added with the selected release. The steps above describe the current App’s Done confirmation.
Undo and recovery
While the App is still open
- After a successful move to Trash, choose or press ⌘ Z while that action is available.
- Wait for the operation to finish, then check the original folder in Finder.
- For a Live Photo, check that both its image and video have returned. Read any error or conflict message rather than assuming every file was restored.
After quitting KeepDrop
After quitting, the same-session Undo command is no longer available. KeepDrop records Trash operations for recovery, but interrupted moves and restores do not have a blanket automatic-recovery guarantee. You can also open the Mac’s Trash and use Finder’s Put Back action where available. Check the destination and both parts of any Live Photo.
If the Trash has been emptied
KeepDrop does not recover files from an emptied Trash. Recovery depends on another existing copy or a backup.
The final release will be checked for paired-file recovery, external-drive behavior and interrupted operations. Keep the source drive connected while a file operation is running.
Keyboard reference
These shortcuts apply when the relevant App view has focus and the command is available.
| Shortcut | Action and context |
|---|---|
| ⌘ O | Add a folder to the shared library. |
| ⌘ R | Rescan the selected imported folder. |
| Return | Open a selected photo in Gallery / Flow, or a selected Similar group. |
| K | Toggle Keep for the focused comparison photo in Similar. Click that photo’s pane first. |
| ⌘ Z | Undo Move to Trash when available in the same App session. |
See the App in action
This introduction does not demonstrate the final Done confirmation, Trash or Undo. Similar synchronized zoom and pan footage is still pending.
If something gets stuck
I cannot find Flow or Similar
Choose All, Favorites or a folder for Gallery and Flow. Open Similar directly from the sidebar to review the shared library. See the updated Similar steps.
KeepDrop cannot access my folder
Check that the original folder and drive are available in Finder. Select the imported folder and choose File → Reauthorize Imported Folder… when offered, then select the original folder in the picker.
The folder changed in Finder
Select the imported folder and choose File → Rescan Imported Folder. Wait for the rescan before starting another file operation.
A Live Photo does not play
Check that the local export includes both its image and paired video. In Flow, playback also depends on the playback setting and whether the item is visible. See format and playback troubleshooting if both files are present.
I only want to remove a sidebar folder
Right-click the top-level registered folder and choose Remove from Library, then review the confirmation. This removes the registration; it does not delete the folder or its photos in Finder.
For other issues, see Support. Installation and release availability are listed on the release page.